As a Seattle Home Inspector I inspect a fair number of wood shake roofs. Many of these roofs will have some patching done. Invariably this patching will result in exposed nails being present. If done properly there is no reason to have exposed nail heads on repairs like this. There is a tool called a “shingle ripper” that is designed for removal of the bad shingle—but installing the new shingle without leaving any nails showing involved magic.
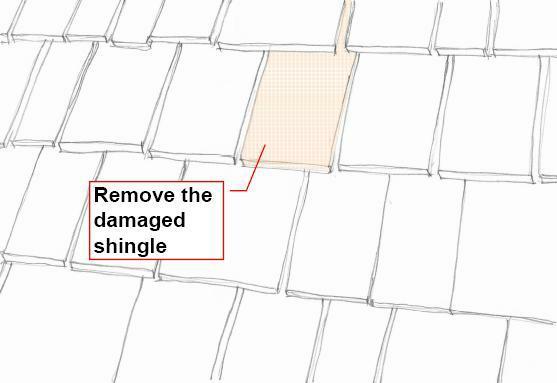
With the shingle ripper, the user will be able to easily remove the damaged shingle without destroying the good shingles around it. I made a series of pictures to demonstrate how this tool works.
1.

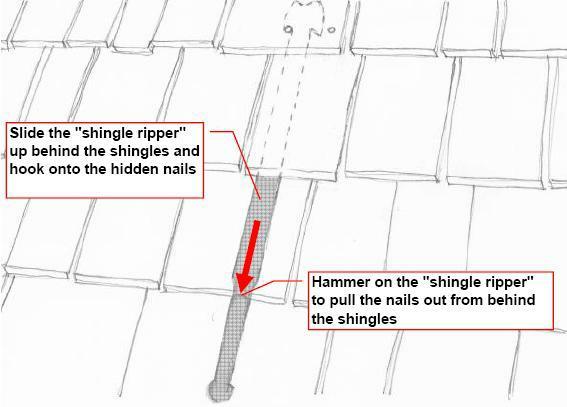
This next picture shows how the “Shingle-Ripper” slides up behind the layers of shingles where it can hook onto the hidden nails which can then be drawn down and out from under the shingles.
2.

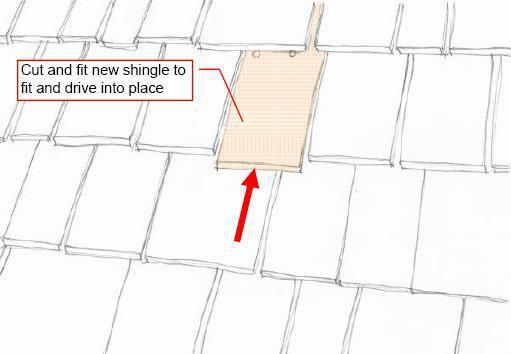
Then a new shingle is cut, fitted and driven into where the old shingle was.
3.

Next we come to the part that annoys Home Inspectors—-and quality roofers.
EXPOSED NAILS
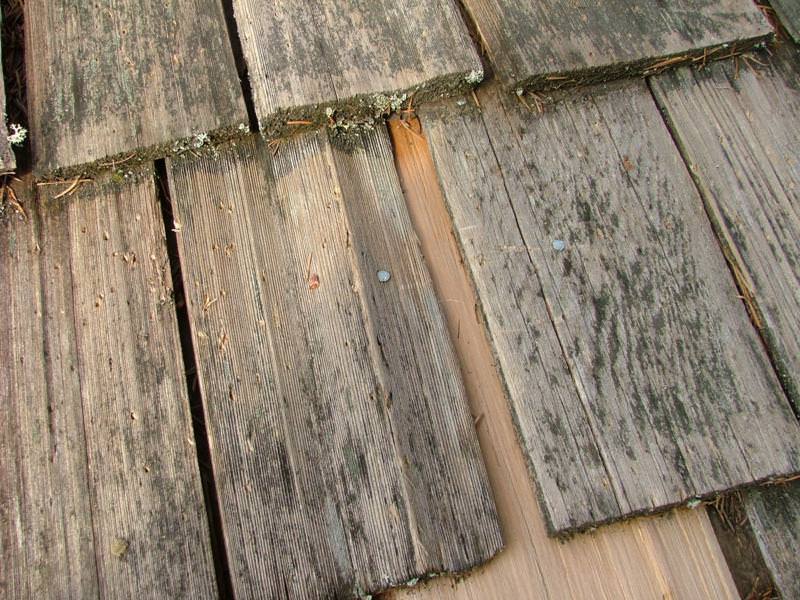
There is NO reason for there to be any exposed nails like the ones that show in this next picture.

The next picture shows how the replaced shingle can be nailed in place without leaving any nails showing. The shingle is slid into place except for about ½” (see Picture #3 above). The shingle is then nailed at an angle right at the base of the overlaying shingle. The shingle is then driven the rest of the way in carrying the nails underneath the overlaying shingle.

Really a pretty simple trick—and not magic at all.
***
Charles Buell, Seattle Home Inspector
If you enjoyed this post, and would like to get notices of new posts to my blog, please subscribe via email in the little box to the right. I promise NO spamming of your email